So, you are trying to watch the game on your projector. But the light bleed is kind of ruining the mood. Now, how do you fix the projector light bleed?
Projector light bleed can be fixed by adjusting the correctness of the projected lens, correcting the keystone, or using the right screen. Also, balancing the contrast ratio may help as well. If one of these components is somehow messed up, the projector light bleeding or projector halo effect can occur.
In the next section, you will get to know about the reasons and solutions for fixing projector light bleeding.
What are the Reasons Behind Projector Light Bleed?
There are a couple of reasons why your projector may be bleeding. Let’s see what the reasons are and also we will be discussing potential solutions to those problems.
Wrong Projected Lens:
If the lens of the projector is not projected correctly, it could cause the projector light to bleed. So, you will have to check the circular extremeness of your projector lens.
Solution:
Check if the projector lens is properly aligned and centered within the projector housing. Some projectors allow you to manually adjust the lens position to ensure it is correctly centered.
Also, make sure that the projection surface is flat and leveled. Any irregularities or curvature in the surface can contribute to image distortion and light bleeding. Consider using a proper projection screen or a flat, white wall for the best results.
Keystone Correction:
If the projector is not positioned horizontally toward the screen centerline, this is called keystoning or keystone correction. This means the projector is not aligned according to the screen and is making an angle vertically.
Therefore, your projected image can be skewed, bent, or displaced from its actual alignment. Because of this misplaced and non-perpendicular projector. This is a major cause of projector light bleeding.
Solution:
There are mainly two ways to correct the keystone of your projector. They are vertical correction or horizontal correction.
To vertically correct your keystone, follow the below steps-
- To ensure a rectangular image, make sure the projector is perpendicular to the projection surface (wall or screen).
- A downward adjustment of the vertical projection angle will level the projector and correct the keystone image.
- You can adjust the projector height by lowering the projector if the image appears too high.
- If the image appears too low on the wall, you can raise the projector’s height.
To horizontally correct your keystone, follow the below steps-
- The lens should be horizontally aligned with the center of the image or screen to ensure a rectangular image.
- If the image is skewed, rotate the projector clockwise (right) or anti-clockwise (left) until it is rectangular.
Also, some projectors have the feature to horizontally or vertically correct the keystone in the remote. If your projector has a lens shift feature, that will work too.

Inappropriate Screen:
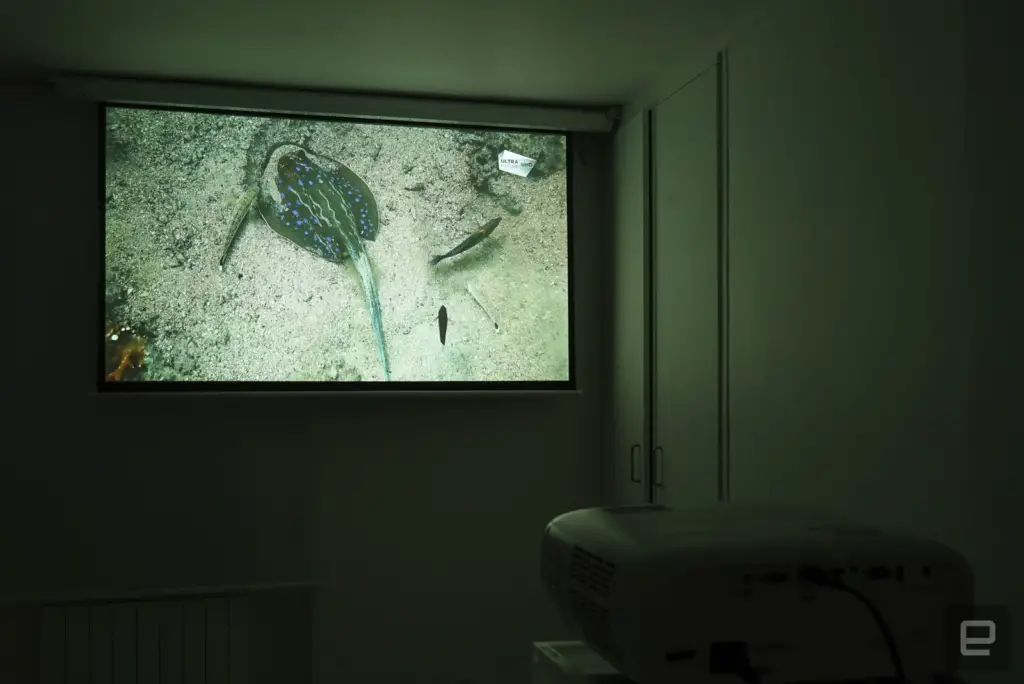
Having the right screen for a better image or video output is crucial. If your screen has a rough surface or darker colors you will not get the optimum result. That’s because the surface then will not absorb all the energy from the projection.
Solution:
Make sure that your screen has no rough spots and has a dark-colored border. That way you will have the best results with no projector light bleeding. In this case, a tuppular projector screen may be a good fit.
Improper Contrast Ratio:
An improper contrast ratio can create a halo effect which is also known as light bleeding. Also, with an imbalanced contrast ratio, your overall projection quality will decrease.
Solution:
You can change the contrast ratio from your projector’s remote. Balance the contrast and the brightness using your remote until you get the best image quality.
Is Projector Light Bleed Normal?
No, projector light bleed is not considered normal or desirable. Light bleed is an unintended side effect that can occur in projectors. This causes unwanted illumination or light scattering around the edges or other parts of the projected image.
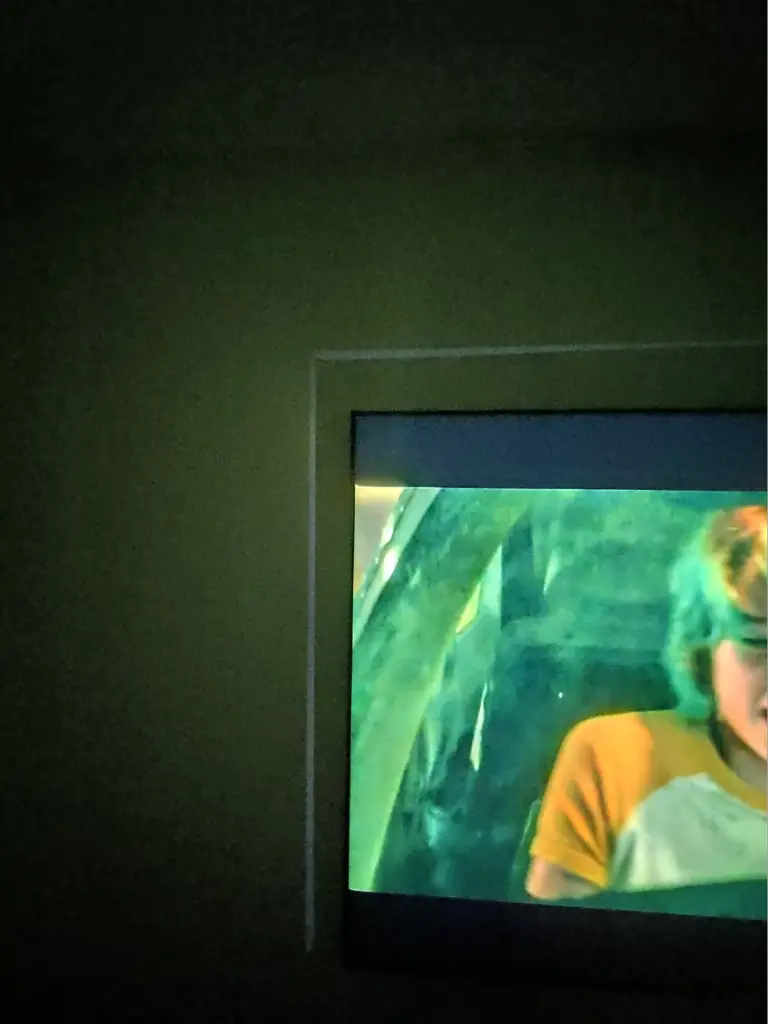
Projector light bleed decreases the contrast ratio and compromises the overall image quality. Projector manufacturers strive to minimize light bleed in their products. Also, users often seek solutions to mitigate or eliminate this issue.
How To Avoid Projector Light Bleed?
So, with the solutions we have suggested above, you will be able to fix the projector light bleeding. But it’s also important for you to know how to prevent this scenario in the future.
Here are 5 tips to prevent over splashing on your projector-
- Projector Placement: Carefully consider the placement of your projector. To prevent bleed onto adjacent surfaces or walls, place the projector at an optimal distance from the screen.
Use the projector’s lens zoom and throw ratio adjustments to achieve the desired image size without over splashing. Also, not placing your projector screen over your fireplace would be a good idea.
- Screen Material: Invest in a high-quality projection screen specifically designed to minimize light reflection and overspill. The gain value of your screen can help control projection angles and prevent excessive light scattering.
Also, if you do not want to invest in a projector screen, you can make a DIY projector screen.
- Screen Size: Choose a screen size that matches your projector’s capabilities and the intended viewing area. If the screen is too large for the projector’s brightness output, it may lead to over splash. Similarly, a smaller screen size may cause the projected image to extend beyond the screen boundaries.
- Ambient Light Control: Minimize ambient light in the viewing area to reduce the likelihood of over splash. Dim the room lights or use blackout curtains to create a dark environment. This will allow the projected image to stand out without spilling onto unwanted surfaces.
- Masking and Bezel: Utilize masking techniques or add a bezel around the screen. Use this to create a border that visually separates the projected image from the surrounding surfaces. This helps reduce the perception of overspill and enhances the overall viewing experience.
- Projection Mapping: Consider using projection mapping techniques. This involves precisely mapping the projection onto specific surfaces rather than projecting onto a single screen. This technique allows for more control over where the image appears and can help avoid over splash.
Frequently Asked Questions (FAQs):
Why is my projector showing red?
If your projector lamp is flashing red, check the input signal and look for any mismatches or configuration errors. Also, inspect your VGA cable for any damage that could be affecting the color output. Lastly, examine the projector screen itself for any discoloration that may be contributing to the red tint.
What causes projector discoloration?
Projector discoloration can occur due to aging, burned, or discolored prisms. This can lead to a washed-out effect of one color dominating the image. Additionally, dust and dirt buildup on internal components, lamp issues, and optical path misalignment can contribute to discoloration problems.
Does wall color affect projector?
Yes, the color of the wall can directly impact the image quality of a projector.
Grey is generally considered the best color as it balances contrast and light absorption.
For a projector screen, a color closer to gray than white is recommended for optimal sharpness and video quality.
Conclusion
Projector light bleed can pour water on your special movie or game nights. But the solution is very simple which you can fix all by yourself. But if you face any problem with the projector itself, you should call in an expert to fix it.
Read also: Cinemark Vs AMC