If you’ve been searching for DIY subwoofers for your home theater, you must’ve come across the tempting term ‘VBSS Subwoofer.’ However, information on this is rather hard to get. So, I hope to clear it up for you.
So, how do you build a VBSS Subwoofer?
First, design the cabinet and choose the right driver as well as an amplifier to assemble the VBSS Subwoofer. Basically, getting the most value out of your subwoofer is the primary aspect of VBSS subwoofers.
I know that wasn’t enough for you. Let’s get right into the meat of the matter.
What is VBSS?
VBSS means Value Buster Subwoofer System, which allows you to get good bass from cheap drivers. In other words, a subwoofer design that emphasizes value. It’s a DIY subwoofer design made by Matt Grant.
Unlike the push-pull subwoofer, VBSS is based on a single design. Although it can be improvised for using it with different drivers. Now that you know what VBSS is, I’ll talk about some of the advantages it offers.
What are the Advantages of VBSS Subwoofers?
The advantages of VBSS subwoofers are low overall costs and excellent performance in small rooms. However, these are the most substantial advantages.
Low Cost:
As per the name of VBSS, the subwoofer design emphasizes value. You can use leftover drivers from your busted subs to make a decent enough subwoofer for your room.
Furthermore, if you’re too lazy to build the sub yourself, you can get yourself a kit from eBay for chump change.
Perfect for Small Rooms:
The VBSS sub is perfect for you if your room is small. The loudness and bass will sound just like expensive subs in small spaces, in my experience. However, the design gradually loses this advantage if you set it up in a bigger room.
How to Build Your Own VBSS Subwoofer?: DIY
Building your own VBSS subwoofer includes designing the cabinet, and choosing the driver and amps before finally assembling it.
However, the process can get complicated and even overwhelming at times. But with some research here and there with this article, you’ll be okay.
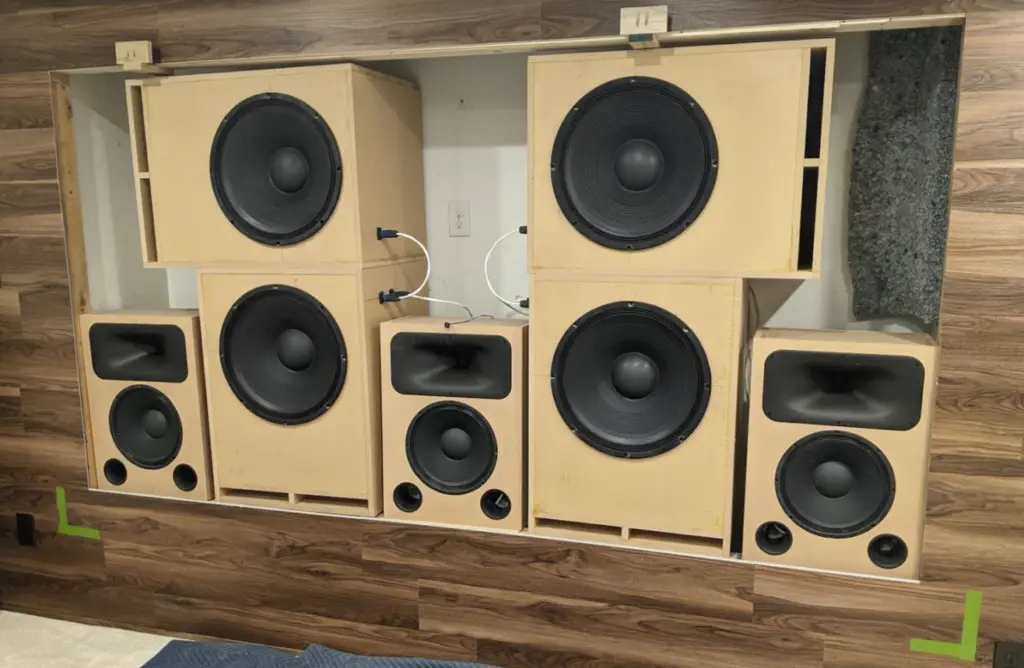
VBSS Subwoofer Cabinet Design:
The VBSS Subwoofer Cabinet should be a ported box with the dimensions being 23.5”x31.5”x20” (WxHxD). The internal net volume should be roughly 6.25 cubic feet.
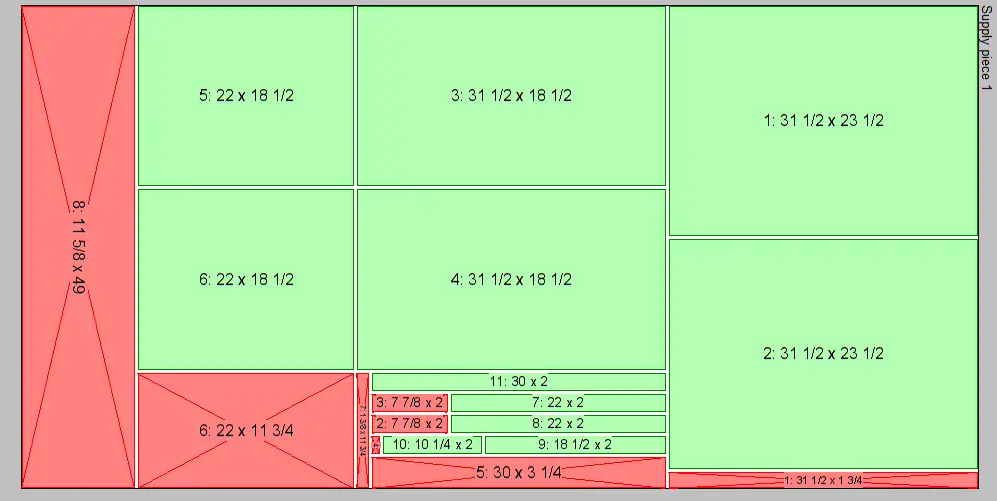
Furthermore, you can add an extra baffle if you want to. It’ll be half inches deeper if you insert an extra 0.5” baffle layer. You can cut the box from one 4×8’¾” plywood sheet for one baffle layer. However, you don’t need it unless you want to flush-mount your driver.
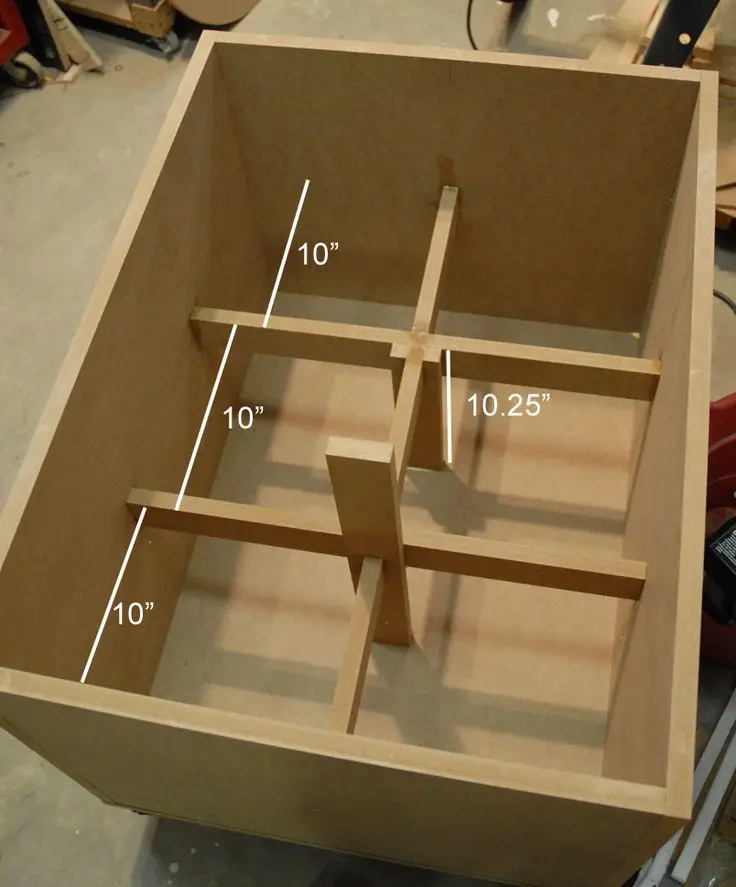
Here are the panel sizes for you to cut a 4×8 sheet to build your cabinet-
- Baffle/Back: 23.5”x31.5” (x2)
- Sides: 18.5”x31,5” (x2
- Top/Bottom: 18.5”x22” (x2)
- Side-to-side braces: 2”x22” (x2)
- Front to lower back braces: 2”x18.5” (x1)
- Front to upper back braces: 2”x10.5” (x1)
- Top to bottom braces: 2”x9” (x3)
- 0.5” Front baffle: 23.5”x31.5” (Optional)
For an overall view of the measurements, take a look at the image below.
Let’s now move on to the ports. You’ll need two 4” precision port kits.
For a 30Hz tune, assemble the ports without any center tube. For a 20 Hz tune, assemble them with a full-length center tube. Finally, For 15Hz, assemble with the full-length center tube while plugging in only one of the two ports.
VBSS Subwoofer Frequency Measurements:
You can test your build with different software after you’re done building. This is just an extra safety net to make sure you did nothing wrong. After you’re done testing it, do match it with the original data from the VBSS design from MTG designs.
VBSS Subwoofer Drivers:
The original design uses an 18” Dayton Audio PA460 pro audio woofer because of its stellar mid-bass performance and lower thermal compression. The size also gives plenty of space for air to move in.
Although the original design is based on Dayton Audio PA460, you can use any inexpensive 18” drivers you’d like for these measurements to work. My personal suggestion for you is to stick to Dayton for VBSS.
Aside from that, you can also go for the GRS 18PT-8; it’s another 18” driver that works almost as well as the PA460. It also outperforms the PA460 in upper bass with much lower distortion.
However, even that isn’t free of limitations. The 18PT-8 cannot be tuned in 15hz, and its output is lower than the PA460. Furthermore, the distortion is higher in the low bass.
I’ll move on to the amplifier now.
Amplifier for the VBSS:
The VBSS is designed to be used with iNuke 1000DSP or 3000DSP amplifiers. Primarily because the amplifiers have onboard DSP that handles all of the relevant settings.
However, you can also go for the NX series amplifiers. They are similar in specifications.
Now you know the design of the cabinet as well as which drivers and amp to choose. All that’s left is to assemble the parts. I’ll elaborate on it in the next section.
Step-by-Step Build:
Building a ported box for a subwoofer isn’t as simple as sealed boxes. However, it’s not too complicated either.
Follow this step-by-step guide to learn how you can DIY a VBSS subwoofer-
Step 1: First, get a 4”x8” sheet of plywood and cut it up into proper sizes as mentioned before.
Step 2: For flush-mounting, your drivers and ports, add an extra 0.5” baffle layer. Skip this step if you don’t want to flush-mount.
Step 3: Put the box together with all the pieces and brace everything properly so they fit well.
Step 4: Next, for the damping, you can use fiberglass, cotton insulation, acoustic foam, or similar material. Put one piece on the port tubes right below the drivers. Put some pieces above and behind the drivers with enough airflow space above the ports.
Step 5: Now, for the ports, you’ll need two 4” precision ports as I’ve said earlier. Use electrical, duct, or masking tape to attach the ports to each other. You can adjust the enclosure’s depth to control the tuning.
Step 6: You can use 6mm machine screw bolts to fit and mount the drivers. Avoid thick bolts for this. Fixing the drivers might be tricky for you if you’re a beginner at this. It’s best if you get help from an expert to do the wiring.
Step 7: Once you’re done assembling everything in place, use glue and screws to put it all together. Don’t use T-bolts as they might be difficult to use on timbers like MDF.
Step 8: For the last step, you can have your box painted or sprayed to finish it up.
And with that, you should have a complete, functioning VBSS subwoofer now. Now that you’re done with the building process of the sub, let’s see if building it is actually worth all the effort.
Are VBSS Subwoofers Worth It?
No, VBSS Subwoofers are not worth the effort for home theaters. However, if we’re talking music, VBSS is absolutely worth it because of its punchy bass and great transient response.
Despite the fact that VBSS doesn’t face the subwoofer bottoming out issue, It just isn’t worth it for home theaters. I’ve tried comparing it to the Marty design too to make it clear.
VBSS vs Marty:
Marty is much better than VBSS when it comes to home theaters. The Low end of Marty is better than VBSS by a significant margin. Despite VBSS having a better transient response, it ultimately falls short of the Marty design.
Marty and VBSS are both DIY subwoofer designs with relatively similar price margins. Marty is much more catered toward movies with a better low-end response, whereas VBSS focuses on music more.
In Conclusion, If you want to design a sub for your home theater, don’t go for VBSS. However, if music is your calling, then VBSS is worth it.
With that out of the way, I’ll now answer some of the frequently asked questions before concluding the article.
Read also: What Kind of Projectors Do Movie Theaters Use?
Frequently Asked Questions (FAQs):
Is the VBSS subwoofer waterproof?
No, the VBSS subwoofer design is not made with waterproofing in mind. However, you can try to implement waterproofing measures of your own. However, this might compromise efficiency, so do it at your own risk.
Is the VBSS subwoofer long-lasting?
Yes, as long as you use good components, VBSS will go a long way. It can last even decades. However, it’s not really worth keeping that long.
Are VBSS components easy to find?
Yes, VBSS components are very easy to find. You can get them from amazon, eBay- almost all online stores. Not only are they easy to find, but they’re also very cheap.
Read also: Is IMAX Worth it? A Complete Review
Final Words
That’ll be it for this article. I hope I was able to clear out the concept of the rather obscure VBSS Subwoofer design for you. What about it? Will you be building a VBSS subwoofer of your own?
Let me know in the comments below. See you next time!
Read also: D-Box Vs IMAX