How to connect MacBook Air to a projector? Connecting Mac to the projector is relatively simple, even novices can do it. Users often link up MacBook air to a projector to get a bigger display for presentation or entertainment purposes.
Many people find it difficult to connect these devices and do not know how to fix issues that arise while connecting them.
In reality, it is easy to connect a projector to a Macbook Air, all the user needs are the right cables and follow a few basic steps to get it done.
How to Connect MacBook Air to a Projector?
The key to connecting the projector and MacBook Air is to identify the ports on both devices and purchase the right cables. Many MacBooks do not come with in-built HDMI ports, however, they can be connected to an HDMI input using the port adapter.
Once you have purchased the right cables and adapters, move on to the next stage of connecting these two devices. Follow this comprehensive, step-by-step guide to hooking up Mac Air to a projector:
1. Turn on Mac Air
Power on Mac Air and ensure that it is fully charged before establishing the connection. If not charged, connect it to the socket with the charger and link it to the projector while charging.
2. Power on Projector
Turn on the projector as well for the Mac to detect the projection unit and allow the connection. Plug the projector’s power cable into the electric outlet to power it on. If it is not turned on, make sure that the cable is plugged in tightly.
3. Connect the Right Cables
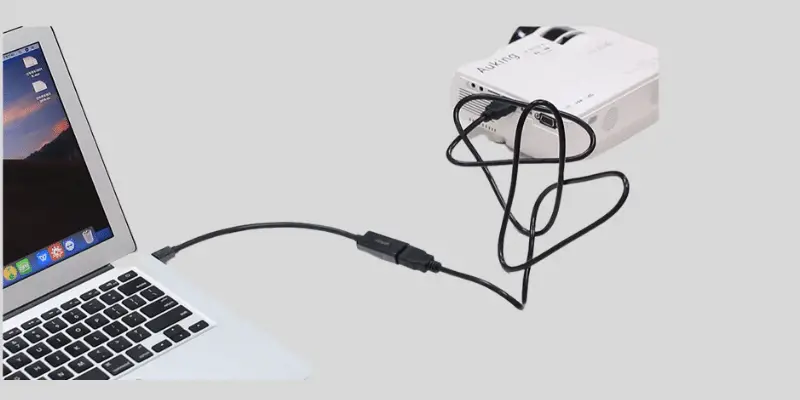
Once both devices are powered on, the next key step is to connect the right cables. Mac Air and projector would not be linked if cables are not connected correctly.
Check the kind of input options Mac Air and projectors have to invest in the right cables and adapters. Mostly, not many MacBooks have the same input ports as projectors like HDMI, VGA, or USB-C ports.
If the Mac Air has HDMI or VGA port, connect it to the projector using the HDMI or VGA cord.
If the projector and Mac Air have different input options, the user will need a multiport adapter to connect both devices. It is important to identify the ports on both units to connect them without any issues.
4. Go To Apple Menu
After the cables are connected correctly, visit the Apple Menu by connecting on the top-left corner of the screen and choose System Preferences from the drop-down menu.
5. Select Display
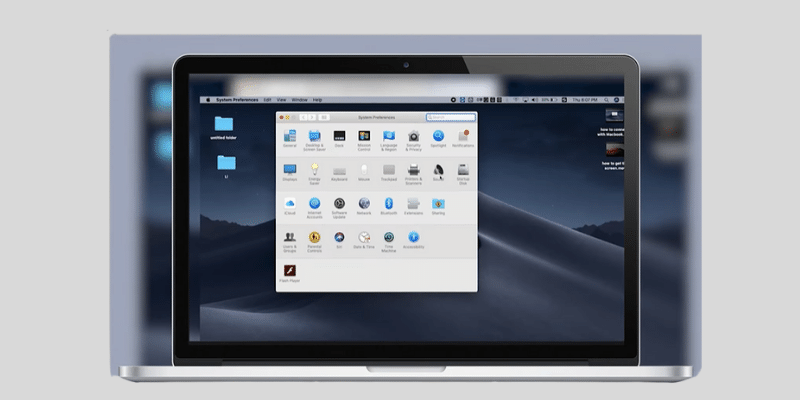
In the System Preferences menu, select Display and choose Detect Displays from the Display window. From there, select the projection unit model. At this stage, the projector should connect to the Mac Air and the user can customize the display setting from the Display menu.
Conclusion
To summarize, having a massive display using Mac Air is quite easy, simply follow a few steps to connect the Mac Air to the projector. Play games, watch entertainment content, and display office presentations easily and with utmost clarity.